


I want to start this short insight into my work as a Level Designer on Rascals Escape with a rough outline of the game, I will especially focus on elements and limitations that informed the level design.
Level Design Goals
Derived from the game design pillars, I always tried to meet these three level design goals through means of testing and iteration.
1. Showcase Europe’s cultural diversity
This goal is based on the setting and the game’s overarching theme. As players travel through different regions and cities, they should get a feel for the diversity of Europe and become excited/curious about its culture. This influenced high-level decisions like the selection of cities during preproduction but also things like the amount of variety between level layouts in the development phase.
2. Easy-to-navigate worlds that reward exploration
Rascals Escape is meant to appeal to a younger audience as well as an overall more relaxed/casual demographic. Finding exciting locations and making your way through cities should feel effortless and reward players who take the time to explore every nook and cranny. This goal especially impacted the level size and afforded special adjustments to the city layout to enable players to memorize it more easily.
3. Levels that can be enjoyed in both Single- & Multiplayer
With Rascals Escape we have tackled the challenge of making it possible for players to play the game in both singleplayer and multiplayer modes. During a play session, anyone should be able to pick up the second controller and join in on the fun. The asymmetric abilities of the player characters, the difference in pacing between the game modes, switching between the characters or the split-screen are just a few examples of elements that informed design decisions and demanded lots of iterations.
The Camera
In order to make the game more accessible to the target audience and stick with the 2D characters from the previous “Squirrel & Bär”-games, we decided early on to not give players control over the camera. While navigating the level, the camera simply follows the movement of the player characters and keeps them always roughly in the center of the screen. This also means that all objects in a scene are only viewed from the front and sides and needed a special solution when a player character is occluded by an element. To make sure players wouldn’t lose track of their characters, a huge part of the level setup involved creating volumes that fade away occluding geometry. And while platforming on a facade that the camera pointed at directly became easier than in other 3D games, jumping into the depth or diagonally turned out to be harder to execute. Therefore, we used these kinds of platforming challenges generally more sparsely and only a bit later in the game when players have grown more comfortable with the controls.
Overall level selection, pacing and progression
As mentioned before, one of the goals of the game is to communicate Europe’s diversity and create curiosity in the players to explore the different countries of our wonderful continent. The first selection of locations for the levels was made by considering what our players might expect from the game (London, Paris & Rome were more or less non-negotiable from the beginning) but also what locations/countries are more underrepresented in media, would make for a pleasant surprise and create more variety between levels. In the same vein, we also made sure to cover Europe’s different climates from north to south.
Before settling on the first draft of levels, we also discussed which countries, cities, and places that appealed to us personally. Aside from obvious major cities, we therefore also included some underdogs, smaller places that are home to unique sights or traditions.
With that selection made, I started to connect the overarching story through rough plot points with specific locations and interweave them thematically. I determined three types of level sizes (which we later condensed to two for the sake of simplicity) and planned out the route players would take chasing the Rascal through Europe. My findings I then collated up into a chart to share with the team and create a starting point for iterating.

Levels with fast pacing were supposed to have tightly linked main quests that are more action based and suggest to players that they are close to catching the Rascal (fantasy: hot pursuit). Levels with low pacing should have more loosely connected main quests and convey that Squirrel and Bear are not in a hurry to create a narrative break (perhaps to tell a side story). These levels also focused more deeply on helping NPCs and connecting with the place (fantasy: relaxed vacation).
The level selection would undergo multiple iterations, and we ended up having to cut a lot of the levels due to a variety of factors like the game’s playtime or to assure the same quality across all levels.
My level design workflow for Rascals Escape followed what I recon the very standard structure of planning, building a blockout, iteration, and polish. Still, I would like to give a brief insight into my process, what I put my focus on, and which things changed through iteration.
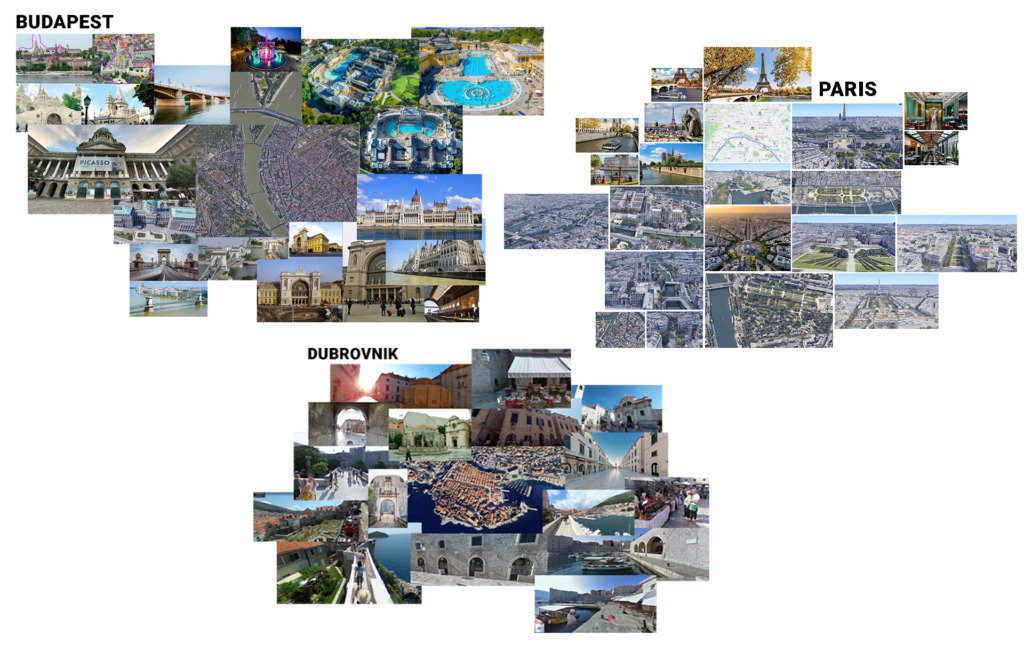
Gathering visual references
For most cities, the team and I already had ideas about which places and sights to include, but beyond that, I researched interesting locations, took my time scouting the city through Google Street View and sometimes pictures from past travels. I would have loved to visit some of the cities as part of the research, but unfortunately, the pre-production phase took place during the height of the Covid pandemic. For each city, I then compiled my findings into a moodboard. In addition to images of buildings, places, and streets, I also tried to include examples of the prominent architectural styles of the city or unique objects (e.g. the red phone booths in London).
However, most importantly I always tried to find references that spark curiosity and the urge to explore/interact as these are the most helpful later on in the process.
Gameplay & Story Beats
With the information we gathered about the culture and the mood board, we then settled on a selection of elements to include in the level. Always considering which would fit neatly together to make for an interesting story or scenario. We then talked through and planned how we would create quests and gameplay from them, taking into account the “tools” at our disposal. Gameplay beats like climbing, platforming, stomping (e.g. to destroy an obstacle), and collecting items but also elements like levers, buttons, gates, dialogue choices, cutscenes, and so on.
We also tried looking at the quests through the lens of the two game modes. We talked for example about how often you had to switch characters to complete a quest when playing alone or what would facilitate cooperation during multiplayer sessions. However, this was fairly difficult to determine in preproduction without a playable prototype of the level and would, later on, be a point that would need the more playtesting.
Storywise, most of the quests follow a pretty basic structure. An NPC provides the players with an urgent task or puzzle that is tied to a culturally relevant part of the city (e.g. a famous dish or sight). Solving the quest often requires the player to explore another part of the level and for example fetch the ingredients to a dish. Then the players can return to the NPC and, in addition to a reward, they will also receive a hint about where to look next for the escaped Rascal.
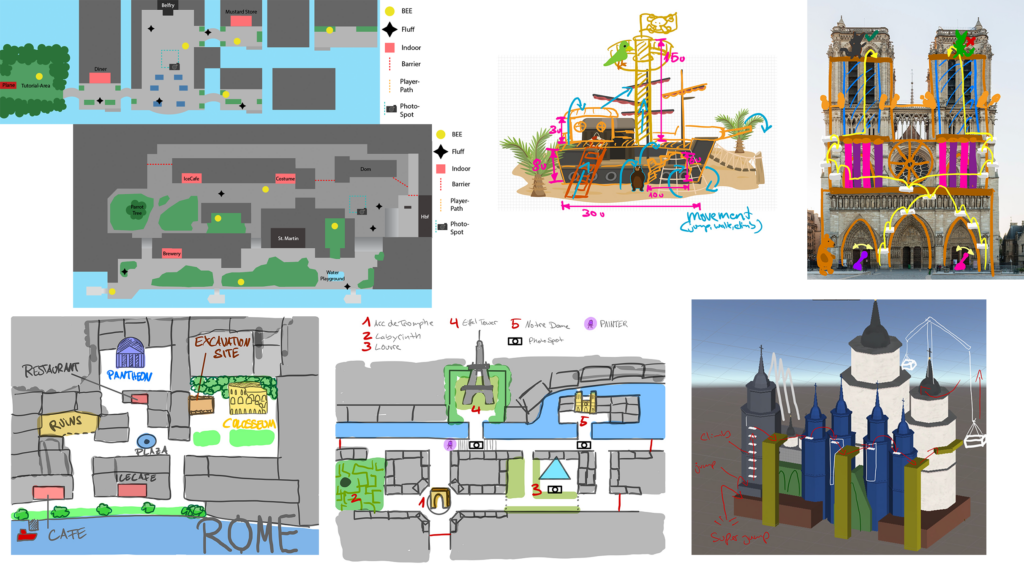
Sketching a 2D topdown
To quickly get a better feel for the player’s path through a level, I created rough topdown sketches. I used these to not only determine where the players would arrive in and exit a level or where to place sights & quest NPCs, but also to make sure that the layout follows a specific rule. Early tests with the camera had shown that navigating the levels would feel best when moving left to right and away from the camera. Especially moving toward the camera should be avoided as the player would not be able to see in that direction (I like to compare Rascals Escape’s level layout to that of a theater set).
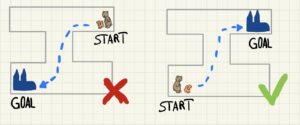
This is by the way one of the things in my workflow that I experimented the most with during development. For the first couple of levels, I made sketches in Adobe Illustrator on a grid, later on, I turned to more quickly drawing the topdowns using my iPad and iterating more in the actual blockouts.
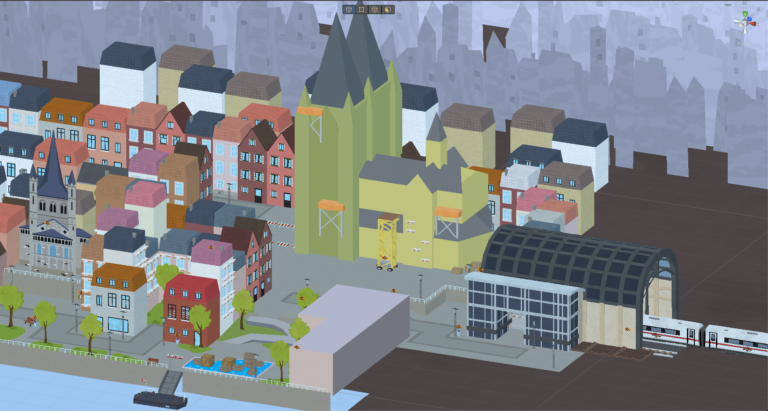
Creating a Blockout
To create my blockouts I utilized a couple of different tools. To populate a level with houses I used our in-house building generator which, as the development progressed, underwent multiple changes and turned into a pretty powerful tool for quickly creating diverse cityscapes. To create more specific geometry and placeholders for elements like street tiles, I used Unity’s ProBuilder plugin. For my first draft of a level, I always try to quickly arrive at something playable without getting lost in too much detail. Meaning I only use simple shapes and utilize already created assets as placeholders where I can. I used for example the asset of the clocktower from Vilnius for multiple blockouts of different cathedrals in the game.
With this first draft, I then proceed to test a couple of basic concepts, like the walking distance between points of interest, rough player guidance (sight lines, vantage points, weenies), and general composition. Based on the results from the test and feedback from the team, I would then iterate on the blockout.
Following this, I set up the rough quest logic for the level and add the involved NPCs and items. Only after these had been tested as well, I would proceed to discuss with our art department which additional assets would be needed for the level.
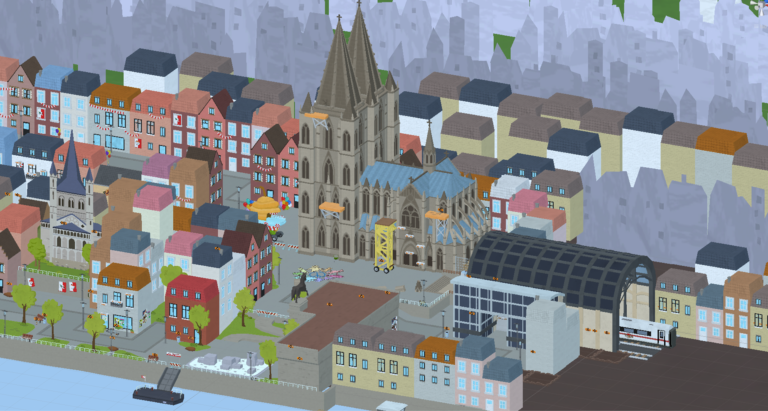
From here on I exchanged blockmesh placeholders with the final assets, populate the level with additional NPCs and collectables as well as set dress the level with props.
In my opinion, the blockout phase is one of the most crucial phases during development. Building quickly, testing regularly, and then iterating levels reveals weaknesses and strengths early on, saving a lot of time (and headaches) in the long run.
Adding Gameplay & Logic
I not only set up interactive elements like levers, buttons, gates, camera tracks, or triggers in the levels I also helped design them. I concert myself a lot with how the environments in the game are read by players and worked closely with the art department to make sure players could easily make out interactive elements. Promoting and denying affordances, using contrast, establishing visual hierarchy, and adding signifiers were some of the means we used to achieve that.
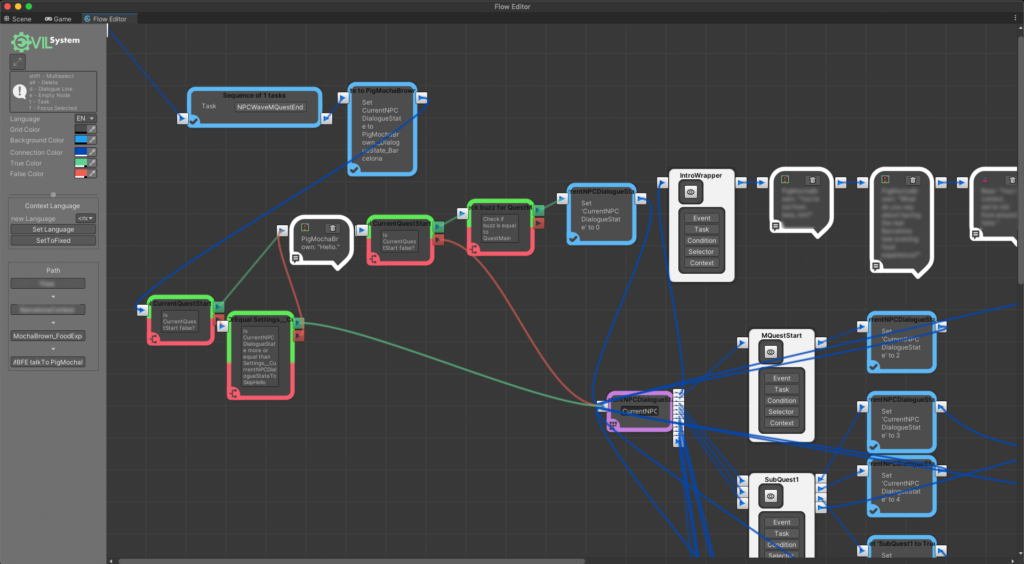
To create the quests in Rascals Escape we used the “EvilSystem”, the Good Evil’s in-house node-based visual scripting tool. While mostly concerning myself with the Level Design, I did my fair part of scripting and even writing some of the dialogue. Establishing templates and a well-documented workflow for the different quest types accelerated the scripting workflow in the later stages of development significantly.
Another thing later on in development that was added to my tool belt was a custom component working with Unity’s Cinemachine plugin, which enabled me to script the cutscenes for the game. Aside from cutscenes that drive the story, I also worked on dozens of small camera movements to establish areas, draw the attention of to items & points of interest, or showcase the change in the level (e.g whenever a previously blocked-off path has been unlocked).
Set dressing & Polish
The last phase that a level went through was only started when major bugs and issues had been resolved, all content had been implemented and no further changes were planned.
Polish is all about ensuring the quality and coherence of the game, here are just a few things that I considered during this phase:
- completing the look of the levels through set dressing with props and decorations like decals or posters
- checking the entire level for gaps in the boundary colliders
- checking if all walkable surfaces are covered by the navmesh
- setting up partolling routes for NPCs
- checking for and adding missing sound effects or visual feedback to make sure that the game feel is on point
- checking for edge cases in branching dialogues/quests/object states